 This Saturday is FREE COMIC BOOK DAY!!! It's the perfect day to go down to your local comic chop and try something you've never tried before, and ALSO to take along someone in your life who has never stepped foot in a comic shop, never read a comic, or is a lapsed fan of the sequential storytelling. FCBD is such a great way to share what we comic fans love about reading comics. It's free, and most stores put on some kind of promotion, sale, or party too. So it's really fun and worthwhile for new or existing comic fans.
I'll be set up at Green Brain Comics in Dearborn, MI for the day, signing Mouse Guard books (including the FCBD offering this year), and doing free quick Mouse head doodles in anyone's sketchbook.
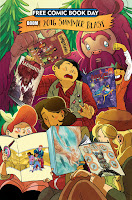
 Like I mentioned, I'll have a new Mouse Guard story in the BOOM!/Archaia 2016 Summer Blast issue (again FREE). And for today's blogpost, I wanted to run through the process for creating the 'cover' image for the story (this image is featured on the cover of the BOOM!/Archaia 2016 Summer Blast where one of the Lumberjanes is reading a Mouse Guard issue, but the image also appears on page of its own inside before my story starts.
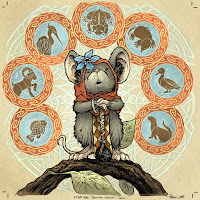
 For the layout, I featured my main character for this story 'Piper' front and center. I surrounded her with knotwork and animal icons with the plan of making this look like illuminated manuscript drawings (like the book of Kells) in the final art. The drawing of Piper was done on copy paper and scanned in to Photoshop where I added in the stock knot-art and some little animal drawings I did separately as well. It looks like I didn't have the stock circle knots around the animals in this saved version of the layout...but I must have added them in at some point before inking.
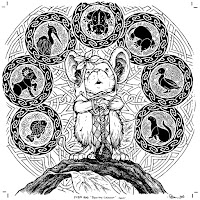
 To ink the piece, I printed out the above layout on standard copy paper, and then taped it to the back of a sheet of Strathmore 300 series bristol. Then, on my lightbox, I can see thorough the bristol surface to the printout to use as a guide as I ink. For my pens, I used the Copic Multiliner SP pens with 0.7 and 0.3 nibs. You will notice that the knot designs never tough Piper, this is to not only push them to the background, but also to make it easier to isolate them when I color so that I can pint the linework as a color (a color hold)
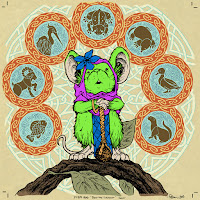
 When the inks are finished I scan them and start the coloring process. The first step when digitally coloring (other than scanning and cleaning up the scan) is called 'flatting'. The purpose is to establish color shapes (the mouse's fur, the cloaks, the leaf, the animal circles, etc) so that as you render areas you can isolate the parts of the color you want to without affecting the parts you don't want to touch. When flatting, you can use any colors you want, they don't have to be anything close to the final color choices, just so long as the neighboring colors aren't too similar to one another.
 Once the tedious job of flatting is done (which is grown-up coloring in the lines), it's time to render, make final color adjustments and finish the cover. To add shading and highlights and texture, I use the Dodge and Burn tools in Photoshop with a textured brush.
To the right is the finished rendered color cover.
Below you will see pencils from a few of the panels from the 8 page story and a un-lettered sample of page 1:
The Tale of Piper The Listener appears in BOOM!/Archaia's 2016 Summer Blast comic FREE this Saturday at your local comic shop.
To find a local comic shop near you:
2016 Appearances:


No comments:
Post a Comment
Note: Only a member of this blog may post a comment.