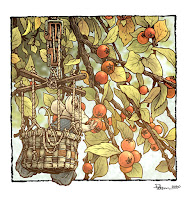
 I've been creating one-of illustrations for my upcoming for my upcoming sketchbook titled 'Dawn, Daye, & Dusk'. The piece to the left is one of those. I streamed a lot of the inking and coloring process on my Twitch channel as I worked.
The sketchbook's theme is loosely about me trying to work in lighting, times of day, and atmospheric effects to my Mouse Guard illustrations.
Below I'll go through the steps I took for this illustration.
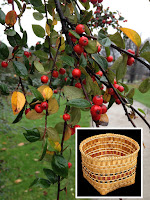 For inspiration before I start a piece like this, I'll sometimes browse digital photo albums of trips I've taken. When I travel I try to take photos of architecture, historic landmarks, decorative details, and local plant life.
 In this case, I found a photo of a tree with little red berries I photographed in a park in Copenhagen Denmark. I'm not sure what the species of tree is, but I liked the look of it enough to take a photo, and again when looking back to pick this as the setting for a little Mouse Guard illustration.
To get a mouse up to off the ground to the berry height, I also google searched this photo of a woven basket.
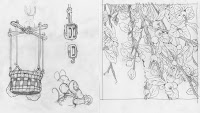 On a light pad, I did a line drawing on a new sheet of copy paper over top of a printout of the Denmark photo. This allowed me to simplify and edit the form and structure and density of the leaf and berry chaos in my own line. On another sheet of paper, I also drew a version of the basket and suspension gear as well as a mouse reaching for harvest.
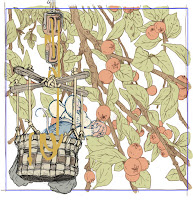
I scanned the drawings and assembled them in Photoshop.Having each bit of the drawing separate on various layers helped me to come up with a final composition that I liked. I could resize and nudge any given element until everything fit, I avoided as many tangents as possible, and the image read clearly.
The quick color work just helped me to see each bit of the illustration, to see the positive forms and the negative spaces. To see what was rope and what was branch.
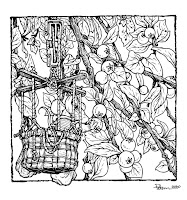
After I was happy with the layout, I printed it onto copy paper and then taped that printout to the back of a sheet of Strathmore 300 series smooth bristol. On my Huion light pad, I was able to see the printout through the surface of the bristol and I could use it as a guide to ink from. I used Copic Multiliner SP pens (the 0.7 nib almost exclusively)
I streamed a great deal of the inking of this piece on my Twitch channel.
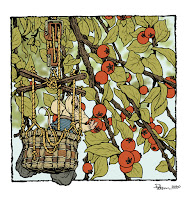
When the inks were finished I scanned the artwork and started the coloring process. That first part of coloring a piece digitally is called 'flatting' and is basically coloring within the lines with flat colors. It's where I'm establishing where all the base colors for each object start and stop. At this point I also created color holds (areas where I want the line art to be a color other than black) for the veins on the leaves and the lines on the berries.
I thought the background was looking a bit vacant between the branches, so I digitally painted in some blurry leaves to push some distance and focus in the illustration.

The last step was to render all the color. This is the step where I add shadows and highlights, texture, and lighting effects. I do most of this using the Dodge and burn tools, the freehand lasso, and the color balance sliders.
No comments:
Post a Comment
Note: Only a member of this blog may post a comment.