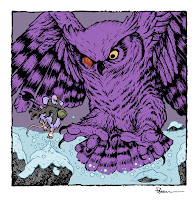
To the left you can see one of those pieces finished and colored ready for a page in that sketchbook––and in this blogpost I'll break down the process to get there.
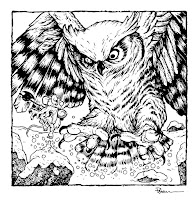
The request was to recreate the epic battle between Celanawe and the One-Eyed Owl from Winter 1152. The fan commissioning the piece asked that the owl be partially in flight. I drew the owl and Celanawe each separately on sheets of copy paper and then scanned them. With each drawing digitally tinted a different color I was able to easily see each figure as I moved, rotated, and resized them to create a composition. I digitally drew in some quick snow blanketed ground and rocks and toyed with the idea of horizontal lines to tone the background.

I printed out the above layout on copy paper and taped it to the back of a sheet of Strathmore 300 series bristol. On my Huion lightpad I can see through the surface of the bristol down to the printout to use as a guide as I ink. I used Copic Multiliner SP pens (the 0.7 & 0.3 nibs). I wanted the owl to have the most density of ink, while fading that off in the tail feathers as the snow is kicked up. I decided not to add the horizontal lines to the sky because I was worried it would compete with the owl and the overall composition..
When I had these inks finished, Julia shipped off the original art to the its new owner.
 Before the art was shipped off though, I got a high-res scan of it so I could start the coloring process for this piece. That first step is called 'flatting' which is basically a professional task of coloring-in-the-lines and establishing what color area each thing in the piece is. The final color choices don't matter so much here, and to take the pressure off, I went with some garish choices just to get this step done.
 I also took this step to establish color holds (areas where I want the black linework to be a color other than black) on all of the snow and the wounded eye.
Here are the final colors all rendered and textured. I do most of this work only using two tools in Photoshop: Dodge and Burn. These are tools that date back to when Photoshop was a photo retouching tool and emulate part of the development process to over and under expose areas––ie: make areas darker and lighter. So with a stock textured brush I add shadows and highlights.This piece will eventually be collected with many more in an upcoming sketchbook I plan to release in early/mid 2022.


No comments:
Post a Comment
Note: Only a member of this blog may post a comment.