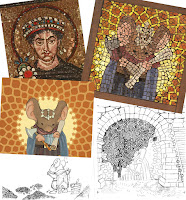
 I've released a new Mouse Guard sketchbook titled 'Dawn, Daye, & Dusk'. It can be found in my online store: https://mouseguard.bigcartel.com/
I've created new pieces for almost the entire contents of the collection––mostly themed on trying to get certain lighting effects in to show time of day...though some of the include those ideas thematically.
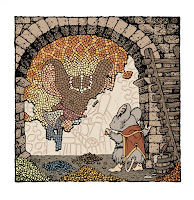
This Mosaic Maker piece to the left is a finished piece for that collection. And below I'm going to go through the process steps to create the art.

Reference/Pencils:
For the collection I wanted to show a mouse making some kind of artwork––perhaps something large, like a fresco or a mosaic. I looked up a few Byzantine mosaic portraits and then was drawn back to the 2015 Mouse Guard mosaic I made for the 2015 Bookplate (http://davidpetersen.blogspot.com/2015/03/2015-bookplate-process.html). I decided to draw the mouse who is constructing it within the world of the Mouse Territories. I went back to a clean version of the mosaic design and on a lightpad drew it out in fragments.
 Layout:
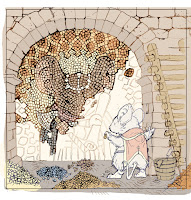
I took my two pencil drawings show above (the partially completed mosaic in the arch and the mouse placing a piece) and scanned them into Photoshop to get some colors in there to make sense of those shapes as well as to get the piece in a nice square format for the sketchbook page. I ultimately cropped in a bit tighter than the original pencils and had to shift the ladder in closer to the edge of the arch so it still fit in the piece.

Inks:
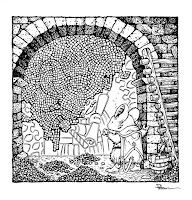
To ink the piece I printed out the above layout and taped it to the back of a sheet of 300 series Strathmore Bristol. On my lightpad, I was able to see through the surface of the bristol down to the printout to use as a guide to ink from. I used Copic Multiliner SP pens as I inked every little mosaic chip and double lined each wall-sketch mark.

Flat Colors:
With the inks done I scanned in the physical artwork back into Photoshop to start the coloring process. Here I painted in flat versions of all the colors––where those colors started and stopped, like a professional version of coloring-in-the-lines.
I also established a color hold over all the mosaic seam lines as well as the marks on the wall defining the pattern in the unfinished places.

Final Colors:
The last step was to render the final colors in Photoshop using the Dodge and Burn tools. Those tools are used to darken and lighten base colors to form shadows and highlights. Using a stock texture brush also helps add some life to the rendering.
The most time consuming part was adding little edge highlights on nearly every tile.


No comments:
Post a Comment