Tuesday, November 19, 2024

Sandmason Mouse

Earlier this year I did an inked commission of a Mouse from Sandmason on a desert mount.
The plan is that this piece will be included in the next Mouse Guard sketchbook (hopefully out mid-next year).

I've colored it for that eventual sketchbook and in today's blog, I'm going through the process for drawing, inking, and coloring the final image you see here.

The fan's request was a mouse from Sandmason (a location on the map of the Mouse Territories I've never taken readers to in the course of the books––but a style of dress I did show in the extras of the Winter book when delegates from various cities come to Lockhaven for a summit) on some kind of a mount in the desert sand ala Luke on a Tauntaun on Hoth in The Empire Strikes Back.

The only lizard in Michigan (and I know you're thinking Michigan isn't a desert––but we do have sand dunes, which to a mouse...) is a Five Lined Skink.

I penciled the lizard and the rock on a sheet of copy paper, the mouse on another, and then on a light pad with a fresh sheet of copy paper over the lizard drawing, I drew the saddle/seat and assembled them all together in Photoshop.
I printed out the above pencils/layout and taped it to the back of a sheet of Strathmore Bristol 300 series. On my Huion Lightpad I was able to see through the surface of the bristol down to the layout to use as a guide while I inked the piece. The inks were dong using Copic Multiliner SP pens (the 0.7 nib mainly).

This piece had some tricky textures that had to be subtly managed: the scales, the belly, the sand, the rock...over doing any of those would not just make the piece too cluttered and unreadable, but also would lose the contours of those forms.
With the inks finished I started the coloring process. The first part of which is called 'flatting'. It's essentially a professional version of coloring-in-the-lines to establish what each area's flat base color will be (though, you can use colors that aren't in the final palette and adjust them later) no textures or shading.

It's also at this stage I added in color holds (areas where I want the lineart to be a color other than black) and I established those on the sand, the flag emblem, and the goggle glare).
The last step was to render the final colors. I do this mainly with the dodge and burn tools in Photoshop, but on this piece I did use the paintbrush a bit too. I also will use the freehand lasso tool with a feather (blurred edge) to select certain areas to adjust the color balance on to make subtle transitions––like the skink's nose area.

Hopefully I'll get past my current deadline crunch and get to a point where I know I'll have enough finished images to combine into a sketchbook collection for 2025.

Tuesday, November 12, 2024

Plotmasters Project Re-Run


This week is Jesse Glenn's 50th Birthday. My best friend, the Kenzie to my Saxon and a collaborator for decades. Te celebrate, I wanted to go back and promote our video podcast: THE PLOTMASTERS PROJECT where we looked back and revisited our earliest stories and characters together. Below are all 10 episodes for you to enjoy as we share a fraction of our old artwork and ideas going back to the early 90's and then draw updated pieces to see what those ideas would look like today.


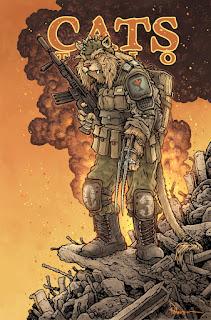
CATS TRIO


QUIETUS

BLACKCAT

DRAGONS pt1


DRAGONS pt2


PSYCHO-MANTIS


HERO SQUAD


R-WARS


FEATHER


CLAW


Gallery of updated pieces:

CATS TRIO: David 


CATS TRIO: Jesse


QUIETUS: Jesse


QUIETUS: David

BLACKCAT: David

BLACKCAT: Jesse


DRAGONS: Jesse


DRAGONS: David


DRAGONS: David

DRAGONS: Jesse


HERO SQUAD: Jesse


HERO SQUAD: David


PSYCHO-MANTIS: Jesse


PSYCHO-MANTIS: David


FEATHER: David


FEATHER: Jesse


R-WARS: Jesse


R-WARS: David


CATS TRIO - CLAW: David

CATS TRIO - CLAW: Jesse


Tuesday, November 5, 2024

VOTE!


vote.gov
For help at the polls, call the non-partisan Election Protection Hotline at 1-866-OUR-VOTE


Blog Archive