
 After watchine a video Adam Savage linked to early this year, I became fascinated with Theo Jansen's Strandbeests. And while my niece Emma was staying with us for a birthday weekend, I showed her the videos of various Strandbeests walking on the beach. She was captivated. And I thought it would be nice to build a table-top model of one...but instead of buying a kit, I opted that Emma and I should scratch build one together. I watched a few more videos, and looked at a few of the model kits online, then Emma and I hit a craft store or two and bought various sizes of popsicle sticks, dowels, florist's wire, round toothpicks, and glue.
 I'd broken down the leg into a simple diagram I traced on to the craft paper we used to protect my dining room table. On the right you can see a single leg assembly with the diagram on the paper below. Once we had our plan, and I could visually decribe to Emma what we were doing, I put her to work cutting and drilling popsicle sticks, and then glueing sub-assemblies. Emma had never used a hobby knife or a drill before, so it was exciting for me to teach her how to use them, and exciting for her to do something so new to her.
 After hours and hours, Emma conked out, and I finished the assembly in the wee digits of the morning. But, it still needed fine tuning. The model Strandbeest has sat in my studio since March, unfinished and fragile, until I got the urge a few weeks ago to repair, tweak, and polish off the last bits of the model. To the left, you can see the finished version, which may not look too different from the older photos above... Directly below, you can watch a video of our hand-crank model in action, then further below, I'll document some details and share the rough plans.
I put clear tubing spacers between each leg joint to
allow less wiggle and slop as everything moved
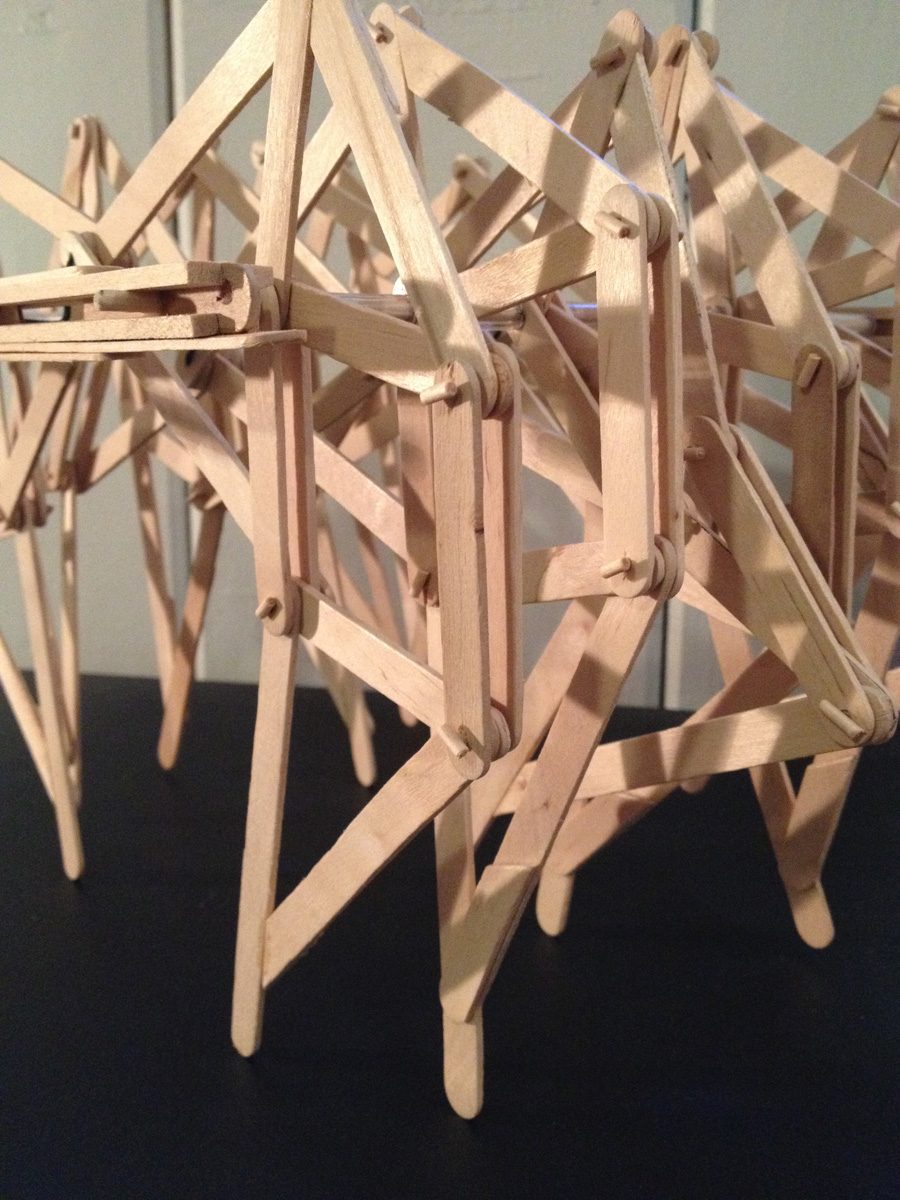
The front chassis that holds the axles was
never completed originally. So, I completed what
needed to be done, and reinforced both ends to
prevent racking and to avoid catastrophe.

All of the moving joints are pinned with round
toothpicks that have smaller cuttings of the same
material glued across the ends to form a capital "I" shape.
Many of these needed minor repairs and re-gluing.

With the chassis secured, I was able to trim down the
length of the axles. I left a bit of them showing so that seeing
the crafted materials were part of the model's charm.

Rough plans & notes for those inspired
enough to try their own hands at one.

3 comments:
My kids were SOOOO upset when we looked up your blog to find out what the deal with the latest on Mouse Guard is. We know there is not going to be a spring of summer book, but they are still holding out hope there are more Mouse Guards coming out soon.
They are HUGE fans and love reading the books they have but want to know what happens to the rest of the story. They also can't help but feel there should be more to the story and to the characters lives. They have asked me to write and implore you to write more stories for Mouse Guard as there are not too many great graphic novels out there for them (they have read Bone, Amulet, Courtney Crumrin, and a few more, but really want more Mouse Guard.
I consider this a great legacy to leave behind, by the way! Please more more!!
Andrea, There will be more Mouse Guard for sure. The next series will be called "The Weasel War"
Currently, I'm in the middle of a big illustration project I need to get off my plate before I even start writing Weasel War, but don't worry, there will be more guardmice from my pen.
Hi there, I have a physics project coming up and I'm trying to build a Strandbeest as per your instructions but I can't seem to have it right.
I made 4 legs instead of 12, they can't stand on their own. Does the amount of legs matter? And also did you place the rod on the bottom leg slightly higher up than usual, is that on purpose? Does it help with balancing?
Also, did you follow the 11 holy numbers, did you leave out a, m and l? And did you divide the numbers to make it smaller?
I used galavinised wire and it turned out to be too soft and too thin, it couldn't turn the crankshaft and move the legs. Will I be able to find florist's wire at the hardware store?
I'm sorry for all the questions, I could really use all the help I can get. I would really appreciate your input. If you would prefer to email me, please do so @ dhaniasorfina@gmail.com
Post a Comment