DISCOVERING DRAGONS
Tuesday, December 27, 2022
Discovering Dragons--A Community Draw Along
DISCOVERING DRAGONS
Tuesday, December 20, 2022
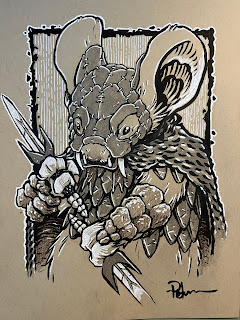
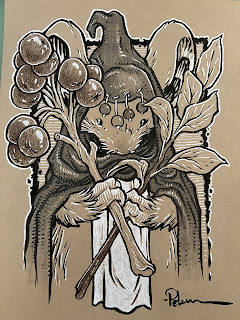
Recent Toned Commissions
I've finished all my recent toned paper commissions for the end of the year:
Tuesday, December 13, 2022
January Mouse Guard 2023(24!) Calendar Art
This year I'm releasing a Mouse Guard 2023 Calendar. I'll be taking copies with me to Baltimore and selling them through my Online Store (**SOLD OUT**). I created seven new pieces of artwork specifically for the calendar (even numbered months mainly). The new pieces were all drawn at 12" x 12" (the size of the Calendar itself)
To the left you can see the final art piece for that 13th month January 2024! I wanted to do something more geometric and stylized, some art the mice would have.
Below in this blogpost I'll walk through the steps to creating it.
I started by searching for 'Medieval Calendar' imagery (things with moon phases or intertwining circles)––when this odd 1974 plate came up. It's a collectable piece of porcelain with a medieval art style to the design. And, well––I really liked it, so I decided to interpret it and resize it in my own way for my own needs. It took a lot of resizing this photo's elements before I could even start swapping out elements. By enlarging the center and eliminating the month calendars I had room to widen the outer ring for a better illustration space.
I redesigned each shield to be an emblem of a mouse city (many of these were already established and hinted at in the extras pages of Winter & Black Axe) I used the month arches to hold the names of those settlements. The center became a mouse-sun and zodiac symbols became a twelve step moon phase.
The last part was to recreate that bayeux tapestry-like ring with mouse figures. I tried to stylize and simplify my version of that, which gave me freedom to use hares, birds, a frog, and a turtle as mounts without worrying about scale.
With the above layout all set, I printed out the image (onto two sheets of legal paper that had to be registered and taped back together). I inked this piece on my Huion lightpad. Using the lightpad I could see through the 12" x 12" Strathmore bristol to the printout below so I could use it as a pencil guide. I used Copic Multiliner SP pens.
The detail was so tight, that I did need to use my smaller 0.3 nib Multiliner rather than the 0.7 I normally use (though I certainly used the 7 on the larger circular borders). I was a trick to get the outer characters to look good and to not want to add texture. Oh! and I messed up and forgot to switch out 'Shorestone' above the shield with the black circles to 'Dawnrock' I know the layout above has it right, but that's because I had to fix it so I could ink a patch of the correct letters onto the back of this piece in the corner to scan and swap out.
Flats:When the inks were done I scanned them into Photoshop and started the coloring process. In this step I am filling in each area with a flat color (no rendering, no textures)–it's like a professional version of coloring-in-the-lines. It took me a while to decide on the color choices here. I didn't want the look of the 1974 reference plate. So I started with the known: the shield emblems. I then pulled from those as I filling in the other design elements around the piece, altering them sightly when needed.
At this stage I also established all the color holds (areas where I want the lineart to be a color other than black) Everything is a hold in this piece––the dark linework is a dark brown, then it was a matter of establishing from a design point-of-view what colors worked best for each other element
Final:
I rendered the piece using dodge and burn tools as well as a stock texture brush to add all the light, shadow, and texture. This piece is an oddity in that I was able to do very little rendering to just add a bit of scuff and focus texture so the piece didn't look so digital.
Tuesday, December 6, 2022
December Mouse Guard 2023 Calendar Art
To the left you can see the final art piece for December. I wanted to suggest a holiday, but without being overly blatant––so this mouse may just happen to wear red when delivering goods to mouse towns and villages in the snow.
Below in this blogpost I'll walk through the steps to creating it.
This stock photo is the sled reference I used for the piece. I'd actually already drawn the mouse with their lantern when I decided I needed to dig for reference. At first, I didn't find sled designs I liked that felt rustic enough while also having space for the load of goods piled up. I was prepared to look at medieval carts with the plan to replace wheels with rails when I found this perfect sled.
As I mentioned before, I started with the mouse in a fur lined coat holding a lantern. Then I used the above sled reference. I did bulk up most of the wooden pieces to make them a bit more fairy tale looking. I also added side walls (like on a kid's wagon). Then on a separate sheet I drew the bundle of goods. Some of those items are recognizable items (a pulley, a cauldron, sourdough bread, swords, bottles, a bolt of tartan fabric etc) but some are just boxes and odd shapes meant to imply important goods. I drew a pine bough (using a photo as reference) but when I had everything scanned and added some quick color blocking, I found that the area needed more density, and quickly painted in more shape.
Inks:
With the above layout all set, I printed out the image (onto two sheets of legal paper that had to be registered and taped back together). I inked this piece on my Twitch stream on a Huion lightpad. Using the lightpad I could see through the 12" x 12" Strathmore bristol to the printout below so I could use it as a pencil guide. I used Copic Multiliner SP pens.
While the mouse and snowy ground were fairly straight forward, there was a lot to take into account in the sled's contents so they read as a mass, but also as separate objects--which also had to be different than the pine background.
When the inks were done I scanned them into Photoshop and started the coloring process. In this step I am filling in each area with a flat color (no rendering, no textures)–it's like a professional version of coloring-in-the-lines. The character and setting's colors were fairly established in the layout stage, but getting all the items in the sled to read took a long time of color selecting.
I rendered the piece using dodge and burn tools as well as a stock texture brush to add all the light, shadow, and texture. The lantern light really set the rendering for this piece, so I had to get the snow shadows and warm highlights established, then get the character lit in those same terms before I could start on the sled or goods. I added in a digital thumbprint trail for his pipe smoke, and digitally painted falling snow.


