Tuesday, November 28, 2023

Saxon Kenzie & Rand on the mossy rocks

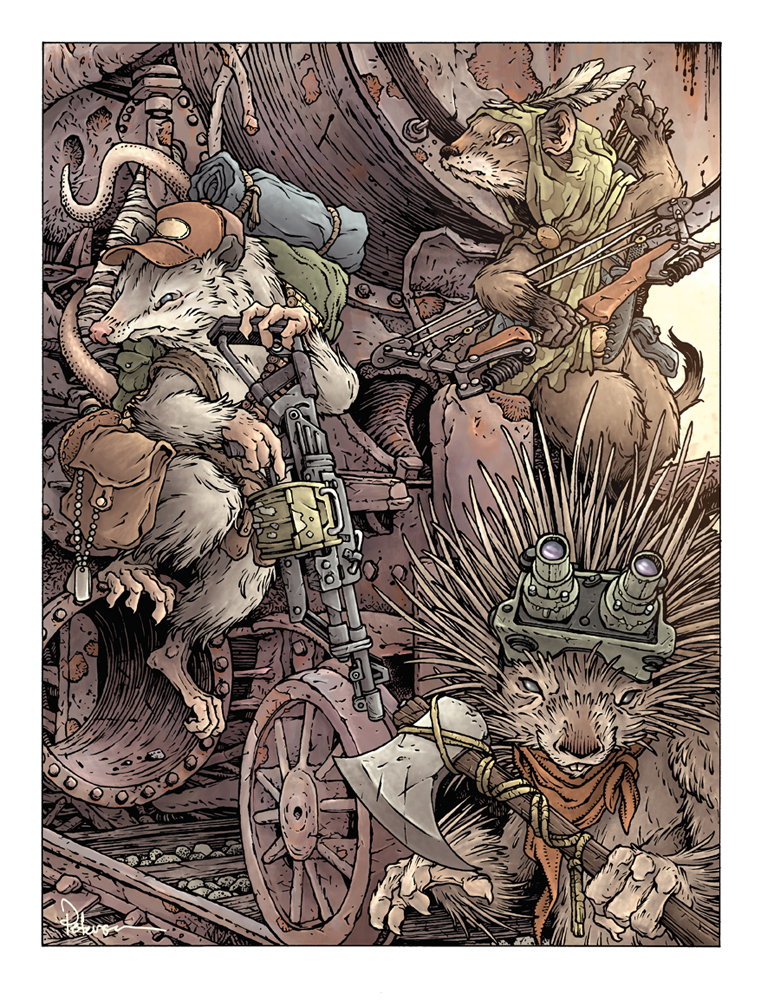
As part of the new illustrations for a 2024 Mouse Guard Calendar, I did this piece of Saxon, Kenzie, and Rand exploring some mossy rocks.

Like last year's calendar, this new one will feature half of the months featuring new-for-this-project artwork, while the other months feature existing favorite illustrations.

Below in this blogpost I'll walk through the process of creating the artwork 


I had 'rocks' written down on a list of calendar subject inspirations. So, I drew the original trio of Saxon, Kenzie, and Rand on some rocks. The rocks have swirl patterns carved into them to evoke a mood from some of the earliest Mouse Guard ink drawings: https://blogger.googleusercontent.com/img/b/R29vZ2xl/AVvXsEiq1hXglj-ughvElAkrkTb_3DlAYMgJ6ASUNKZGp4-MmVmPjtBUNwvHMn-6-BQHs9v6LkB-eIdS45whc73Pc2UuargtfHxwPywZUj9xqUaly9Ecpd0nh6dka52o3Q1rQpu0wgWWxEcWD90/s1600/Lieam.jpg

The drawings of the characters were done on copy paper, scanned into Photoshop, assembled with some quick digitally painted rocks (that I then printed out to do tighter pencil drawings over) and then assembled again.

I printed the above digitally assembled layout onto two sheets of legal sized paper (taping them together so the image was 11" x 11") and then taped them with painter's tape onto the bak of a sheet of Strathmore 300 series Bristol.

On my Huion Lightpapd I was able to see through the surface of the bristol down to the printout and use it as my 'pencils' as I worked. I used Copic Multiliner SP pens (the 0.3 & 0.7 nibs). 

I inked this piece on my Twitch Stream where I mostly focused and got lost in the textures of the rocks and moss. I then finished inked the characters off stream.


With the inks finished, I scanned them into Photoshop and started the coloring process. That first step is known as 'Flatting' and essentially is professional coloring-inside-the-lines. A lot of the color palette was established both by the cannon of what I know the characters look like, but also a bit from my layout stage. 

Here I also established color holds (areas where I want the ink lines to be a color other than black) on all of the grass

The final step was to render the piece. I used the Dodge and Burn tools in Photoshop while using a stock textured brush. I colored a great deal of this on my Twitch Stream as well.

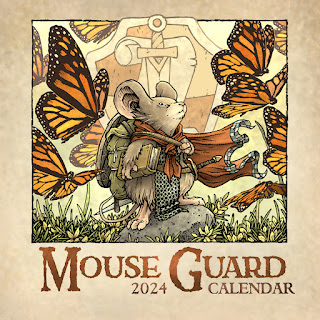
As I said before, the colored image appears in the calendar for 2024


Tuesday, November 21, 2023

TMNT RPG Illustration

The TMNT RPG is being Kickstarted for a reprint/remastering! To quote the campaign: "Teenage Mutant Ninja Turtles and Other StrangenessThe best-selling role-playing game is back, in beautiful full color with new art by TMNT creators Kevin Eastman, Peter Laird, and more!" I am thrilled that I got to be one of those 'and more's to create a new full page color piece for the book.

The Kickstarter is fully funded (and hitting stretch goals), but it ends Nov 28th, so there's still time to back it and get in on this reprinting of the TMNT RPG: https://www.kickstarter.com/projects/palladiumbooks/teenage-mutant-ninja-turtles-and-other-strangeness


I played the hell out this RPG in middle school and high school. D&D was banned in my house, so this was the first RPG I ever played. I loved the mutation character creation process, and my friends and I used this RPG to flesh out characters and ideas for Cats Trio

The folks over at Palladium wanted an illustration that was more than just TMNT fan-art, something that spoke to the RPG itself, random mutant animals or characters and settings from the canned adventures in the books. I had always loved these three separate illustrations by Eastman & Laird from the original book, so I opted to make them into a party patrolling some derelict space.

I redrew each character in my own way, adding gear and clothes from the RPG as well as from the original illustrations. These were done in pencil on copy paper and then assembled digitally. I found 3D reference for the opossum's gun, the porcupine's goggles (still visible in this layout), the weasel's compound bow, and the setting of a rusted out train. 

Over printouts of those models I penciled my own versions, adding my own details and scratches and dings. To help me see everything's individual forms, I did a quick color blocking before sending it off to Palladium & Paramount for approvals.


The Layout was approved to move forward on. I printed out the above layout onto copy paper and taped it to the back of a sheet of 14" x 17" Strathmore bristol so I could ink the piece on a light pad. I use a Huion A3 lightpad, which is fairly big, but this whole piece wouldn't fit on it all at once.

I used Copic Multiliner SP pens (the 0.5 & 0.7 nibs mainly) to ink the piece. I think I spent most of the time on the train, because I knew the concentration of lines to depict the rust and wear would set a darker value for the 'background' and I could then ink the characters afterwards making sure I didn't add too much texture to their forms so they could still be seeing against the train.


When the inks were finished I scanned them and started the coloring process by placing in flat base colors for every form. Some of these colors were already loosely established in the layout stage, but here I needed to start dialing in on the value ranges for everything.

I struggled with the color for the rusty train, and instead of sitting on this step for a night, I went straight in after this flats image was saved to figure out a painted color blend of grays, purples, and oranges that would make the train look less like a cardboard cutout.

For the train, I relied on several layers that I used the paintbrush tool (rather than the dodge and burn I rely on for most all of my rendering) and I painted a shadow layer (set to multiply) to help block in all those geometric shadow transitions. The characters were rendered using my normal method of a stock textured brush and the dodge and burn tools.

Below you can see the final art again, and I want to remind you to visit and consider backing the Kickstarter:  https://www.kickstarter.com/projects/palladiumbooks/teenage-mutant-ninja-turtles-and-other-strangeness

Tuesday, November 14, 2023

20th Anniversary Trip photos

In October Julia and I celebrated our 20th Wedding Anniversary in a house we rented on the Lake Michigan shore just south of Ludington, MI––with the spot on the beach where I proposed 21 years prior within view. We love fall weather, so having the lake to ourself in the cool-crisp breeze and dipping temps was perfect for us. Here are some photos of the trip.


Looking south along the shore. This area is also special to me because as a child, my family camped here regularly atop those bluffs in the woods. The beach here is where I proposed to Julia in Nov. 2002.


People who have never seen a Great Lake in person sometimes can't appreciate the scale and think about a little muddy duck-pond lake. Lake Michigan is vast––even at it's narrowest point you can't see across to the other side because the curvature of the earth takes effect.


The woods up in the bluffs are an area I played in as a kid, and my memories of exploring them certainly influenced what I draw for Mouse Guard...


And these woods have been a recharging point where I return to them to emotionally reconnect with that feeling.


In the years since Mouse Guard started getting published, I've used it also as a place to collect photo reference for the series.


And every now and then the trees thin out and you get a view of the lake from high above like this.


I discovered some fungus growing on a fallen birch tree that I'm sure I'll fit into a Mouse Guard book or illustration at some point.


The sandy soil is prone to eroding and exposing all kinds of root structure and hidey-holes, where it's almost impossible not to imagine a mouse settlement in some of these places.

Walking through and exploring this place in the off season makes it all the more magical. Trees looking like they could walk around and move if you're not paying attention in a warm autumn glow and no other humans in sight.


Though, it turns out I wasn't alone on this walk––I was being watched.


These trees have been exposed like this since I was a kid––and I always see this spot as where a Ringwraith searches as the hobbits hide in the roots and Frodo is tempted to use the one ring.


The longer we stayed, the closer we got to peak fall color.


The landscape was aglow, which is what reminded us of 20 years ago in similar fall colors Julia and I pledged ourselves to each other in front of friends and family.


Lastly, enjoy the walk from the house, through the dune grass, and down to Lake Michigan.

Tuesday, November 7, 2023

Singing Smolder Paper Dragon

Last Friday on my Twitch Stream, we did the #DiscoveringDragons Community-Draw-Along! It's a fun event where I welcome all skill levels to push their pencils (or whatever tools they use to make art).

I worked on my piece live on my Twitch stream while viewers worked at home and then on Monday we shared our finished pieces.

Here is my finished colored Dragon. And below are my steps to create it as well as the community submissions.


For #DiscoveringDragons, I post two or three prompt words for everyone to make into a dragon. It's a nice framework for artists of any skill level to focus some time on an 'assignment' to shake the rust off or get the pencil moving again––all while also being loose enough that there's plenty of room for individual expression and interpretation.

This month the prompt was three words: Smoulder, Singing, & Paper.

I opened several tabs of google image searches of origami and folded paper dragons as well as smouldering paper and musical notation. 


I started my dragon with a very loose shape for a flying dragon, not as though it was made of paper or accounted for folds, just as though I was making note of where I wanted the extremities as well as the volumes those should be.

Then I started defining those volumes as folded paper. I started with the head, and worked my way back, not working about the smouldering until I was done. I found I needed to simplify the design as I kept adding more folds and planes, but they just detracted from the idea that this beast was made of paper. Lastly I scanned the drawing into Photoshop so I could make some adjustments and I digitally drew in some wings and blocked in light color for the forms of the paper and the smoke.


I printed out the above design and taped that onto the back of a sheet of Strathmore 300 series bristol. Using a lightpad, I was able to see through the surface of the bristol as I inked the dragon. I used Copic Multiliner 0.3 and 0.5 SP pen to ink the art. 

The inking on this piece was about making those planes of the folded paper remain to make sense and then deteriorate them where the smouldering bits are alight. There was also a lot of texture work in the smoke trail coming out of the end of the tail that I rushed to get done before I had to end the Twitch stream. 

As the stream ended I wished the viewers all luck with their pieces and told them we'd take a look at everyone's work on Monday.

On Saturday I scanned the inks to start the color flatting process––basically professional coloring-in-the-lines. First step was creating color holds (areas where I want the ink lines to be a color other than black) for the entire dragon as well as the smoke and the flame and notes. Then I flatted in two colors: the paper dragon, and the smoke.


For the final colors I did some painting with the paintbrush tool for all the edges of the burning bits, but did most of the highlights, shading, and texture with the dodge and burn tools and a stock photoshop texture brush. Below you can again see the final rendered dragon.


But, as this is a community event, I wanted to share all the other entries posted in the Discord. 


88UncleErnie


Capt.Nemo


JoDudeIt


Jonathan Towry


Knickolaus


Nate Pride (WIP)


redSkwrl (WIP)


valleyDweller


VernNYC


Blog Archive