Tuesday, October 31, 2023

Recent Toned Commissions

  My Toned Commissions from Baltimore, Laker Con, & NYCC


Bugs Bunny from 'What's Opera Doc?'


Lily & Jasper Bunny from 'Snowy Valentine'


Mouse Don Quixote


An Autumn Guardmouse


Gen from Usagi Yojimbo


Leonardo a TMNT


Mouse Tim the Enchanter


Alan A Dale


Siren/Mermaid (Jeremy Bastian helped me with the face--
because you know, me and humans)


Last Ronin TMNT on a toned blank cover


Lieam with the Black Axe

Remy (Ratatouille) serving a meal to Basil (The Great Mouse Detective)


Tuesday, October 24, 2023

Hawk & Snake

As part of the new illustrations for a 2024 Mouse Guard Calendar, I did this piece of a Guardmouse scurrying away as two predators battle each other.

Like last year's calendar, this new one will feature half of the months featuring new-for-this-project artwork, while the other months feature existing favorite illustrations.

Below in this blogpost I'll walk through the process of creating the artwork


This piece started with a photo of a hawk attacking a pile of leaves (presumably for small hiding prey). I liked the idea of one calendar piece being about a predator battle, but thought, what if the hawk were fighting a snake and that allowed a mouse to hide or escape. 

I drew the hawk and snake on separate sheets of copy paper with the aid of photo reference. I also drew a mice high-tailing it out of there while eyeing some eggs. These were all assembled in photoshop, with each drawing being tinted a different color (to help me see the different drawings easier) and some quick blocky groundcover painted in as well as a stock mace 3D model rotated correctly to match the mouse's pose.


I printed the above digitally assembled layout onto two sheets of legal sized paper (taping them together so the image was 11" x 11") and then taped them with painter's tape onto the back of a sheet of Strathmore 300 series Bristol.

On my Huion Lightpapd I was able to see through the surface of the bristol down to the printout and use it as my 'pencils' as I worked. I used Copic Multiliner SP pens (the 0.3 & 0.7 nibs). 

I inked this piece focused mainly on the hawk and snake and keeping them interesting, but not overly cluttered with detail (especially in the snake's scales).


With the inks finished, I scanned them into Photoshop and started the coloring process. That first step is known as 'Flatting' and essentially is professional coloring-inside-the-lines. I didn't know what the overall color palate was going to be, so I used all awful abstract colors just to make sure I had every shape established: The hawk's lighter feathers, the hawk's darker feathers, the snake, the snake's belly, the leaves, the sticks, the eggs, etc...

Here I also established color holds (areas where I want the ink lines to be a color other than black) on the eggs, and then everything behind the mouse, and then another on everything behind the hawk & snake.

The final step was to render the piece. I used the Dodge and Burn tools in Photoshop while using a stock textured brush. 

I had to do a lot of color replacing before I could start the rendering though. I began with colors close to their real life counterparts and then started adjusting hue and saturation until the piece worked as a whole.

The colored image appears in the calendar for 2024


Tuesday, October 17, 2023

Sparrow and Berries

As part of the new illustrations for a 2024 Mouse Guard Calendar
I did this piece of a mouse harvesting berries and sharing them with a sparrow.

Like last year's calendar, this new one will feature half of the months featuring new-for-this-project artwork, while the other months feature existing favorite illustrations.

Below in this blogpost I'll walk through the process of creating the artwork

This piece started with a photograph I took outside of my in-law's home last fall of their little thicket. I'm not sure what the plant even is––closest I've going on Google is Winter Berry, but that doesn't quite match. Anyhow, I used this photo and added a mouse harvesting berries and a sparrow watching/sharing. 

Bird fans always let me know their appreciation for more birds in Mouse Guard illustrations. The drawings here of the characters as well as the branches they are standing on were done on sheets of copy paper and assembled in Photoshop. I had photo reference for the sparrow drawing.

I printed the above digitally assembled layout onto two sheets of legal sized paper (taping them together so the image was 11" x 11") and then taped them with painter's tape onto the back of a sheet of Strathmore 300 series Bristol.

On my Huion Lightpapd I was able to see through the surface of the bristol down to the printout and use it as my 'pencils' as I worked. I used Copic Multiliner SP pens (the 0.3 & 0.7 nibs).

That tangle of thicket is my zen happy place to ink, but I was worried about losing the focus of the characters, so I left a little white gap around them to help separate them from all that visual mess.

With the inks finished, I scanned them into Photoshop and started the coloring process. That first step is known as 'Flatting' and essentially is professional coloring-inside-the-lines. Some of the color palette was established by the original photo––and then I just extended that to the tones of the characters as well.

Here I also established a color hold (an area where I want the ink lines to be a color other than black) on all of the background that tapers off as it gets lower in the image.


The final step was to render the piece. I used the Dodge and Burn tools in Photoshop while using a stock textured brush.

Getting the depth of field with the tones all being so matchy-matchy was a trick and took a lot of fussing with even after I had everything rendered. In the end I'm very pleased with the result.

The colored image appears in the calendar for 2024:
mouseguard.bigcartel.com/product/mouse-guard-2024-calendar 


Tuesday, October 10, 2023

Crystal Pixie Owl Dragon

Last Friday on my Twitch Stream, we did the #DiscoveringDragons Community-Draw-Along! It's a fun event where I welcome all skill levels to push their pencils (or whatever tools they use to make art).

I worked on my piece live on my Twitch stream while viewers worked at home and then on Monday we shared our finished pieces.

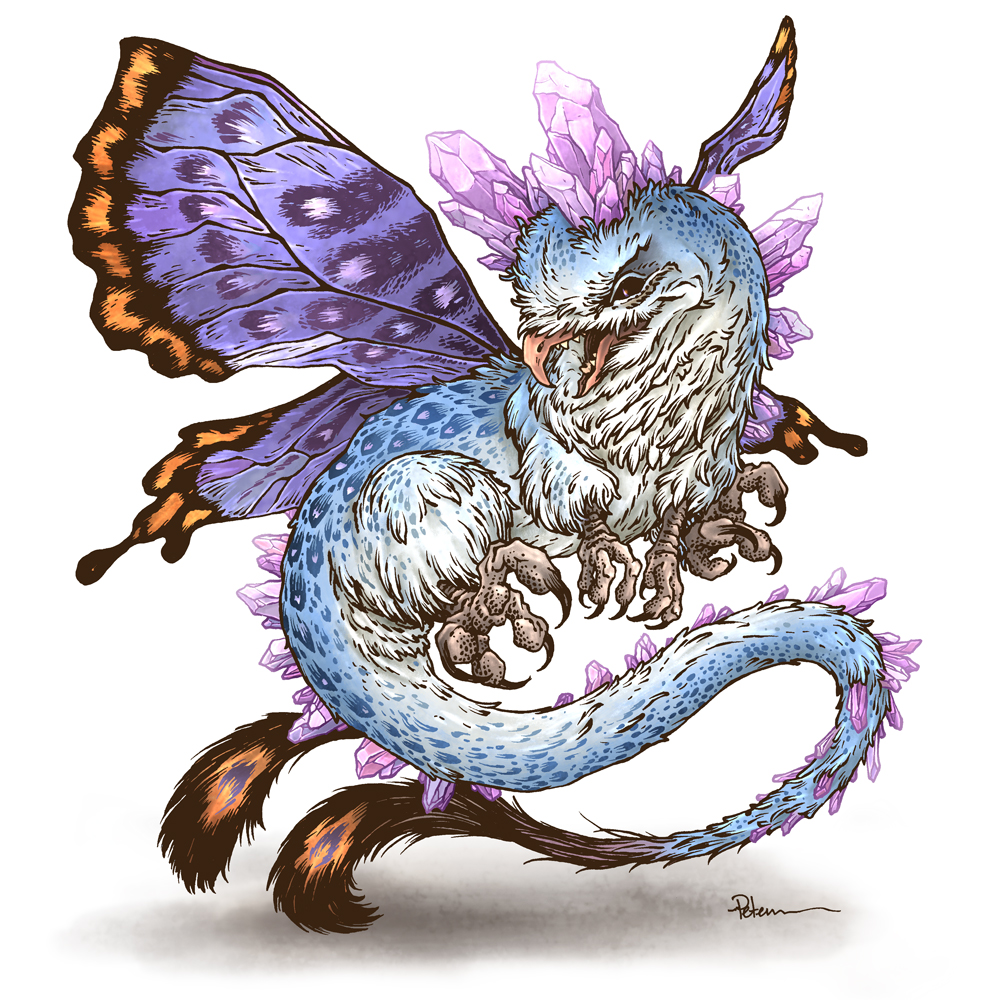
Here is my finished colored Dragon. And below are my steps to create it as well as the community submissions.

For #DiscoveringDragons, I post two or three prompt words for everyone to make into a dragon. It's a nice framework for artists of any skill level to focus some time on an 'assignment' to shake the rust off or get the pencil moving again––all while also being loose enough that there's plenty of room for individual expression and interpretation.

This month the prompt was three words: Crystal, Pixie, & Owl.

I opened several tabs of google image searches of crystal formations, mythical pixies, barn owls, saw whet owls, and butterfly wings.

I considered that it would be possible to make a dragon that was entirely crystalline with owl features and pixie wings––but I knew wanted instead to have the crystals be horns and back-spines of the beast. Originally I was going to limit the owl bits to the face & beak, but after trying some scales on the body, I opted for a feather pattern seen on barn owls.  

This was drawn on a few sheets of copy paper (sometimes with them overlaying each other on a light pad to make corrections/amendments to the earlier versions) and then assembled into what you see here in Photoshop. This process to find and draw a design took me much longer than normal for some reason.

The printout was taped it to the back of a sheet of Strathmore 300 series bristol. Using a lightpad, I was able to see through the surface of the bristol as I inked the dragon. I used Copic Multiliner 0.7 SP pen to ink the art. 

The inking on this piece started with all the line weights for the fluffy feather wringles around the face. I was able during the stream to get into the crystals and the pattern on the body, but ran out of time before getting to finish.

Since I was unable to finish the inks before my stream ended, I wished the viewers all luck with their pieces and told them we'd take a look at everyone's work on Monday.

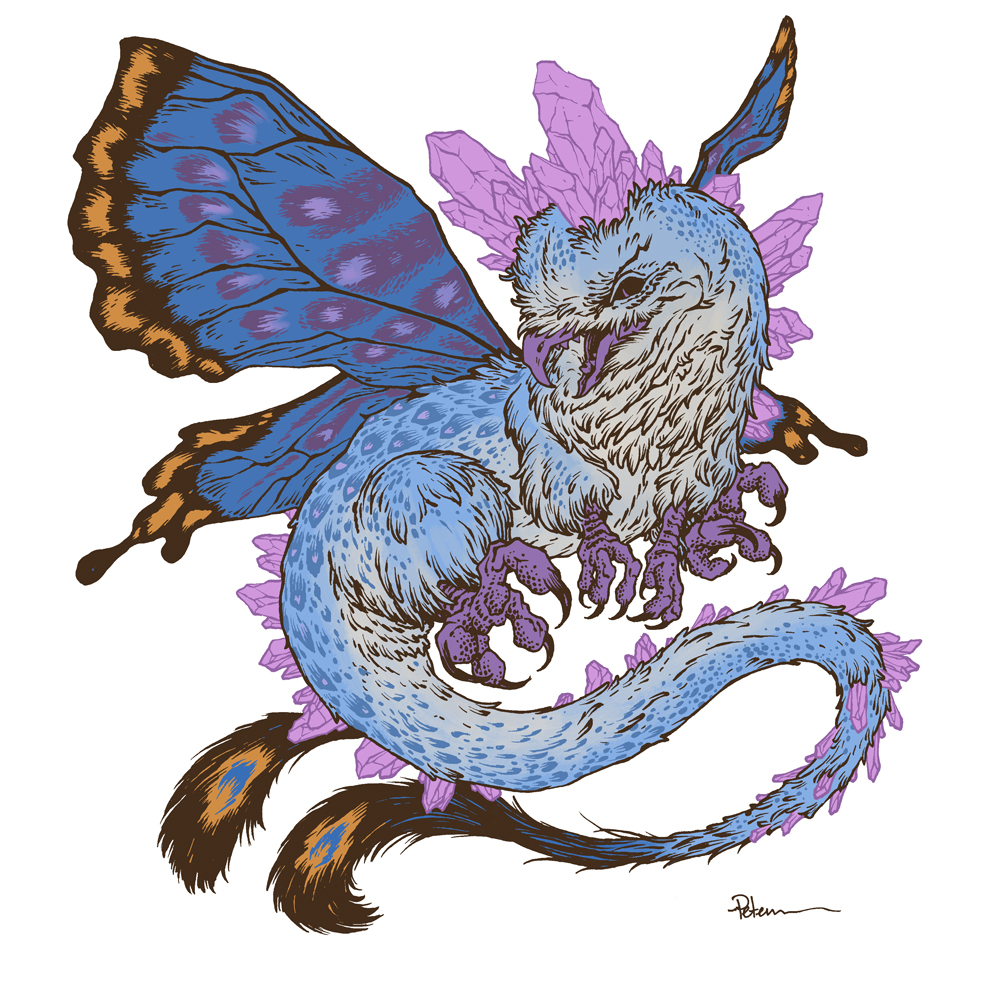
After some dinner, I came back up to the studio and finished inking the piece and then scanned the bristol to start the color flatting process––basically professional coloring-in-the-lines. First step was creating color holds (areas where I want the ink lines to be a color other than black) for the crystals, body markings, & wing patterns. Then I flatted in the various colors (Though I did start painting a lighter belly tone)


On Saturday I dove into the final colors. I did do a bit of painting with the paintbrush tool, but did most of the highlights, shading, and texture with the dodge and burn tools and a stock photoshop texture brush. Below you can again see the final rendered dragon.

But, as this is a community event, I wanted to share all the other entries posted in the Discord.


88 Uncle Ernie


Capt.Nemo


danthebcman


Doombot79


DruffZilla


jodudeit


Jonathan Towry


Nate Pride


RedSkwrl


Sleepless Ninja


VernNYC


Tuesday, October 3, 2023

TMNT Raphael painting for NYCC Auction

For several years there has been a charity auction at ReedPop events (NYCC, C2E2, ECCC...) that benefits St. Jude's Children's Hospital. For the NYCC auction this year, they are hoping to crack the 1 Million dollar mark in total donations since they've started. 

So, to help get them further towards that goal, and obviously to help in all the good work St. Jude's does, I decided to do a 16" x 20" watercolor of Raphael for the auction.

I streamed working on this piece on my Twitch Channel, but forgot to take enough in-process photos, so instead I opted to show the process of this piece through the timelapse below.


If you will be at NYCC this weekend, I encourage you to bid on work in the auction.

Blog Archive