

The story has not been published in print form––but when I have two more of these types of tales finished, we will have enough to publish another collection of them. In the meantime, this blogpost will go into the process for creating the 'cover' art for this story.

Rough/Pencils:
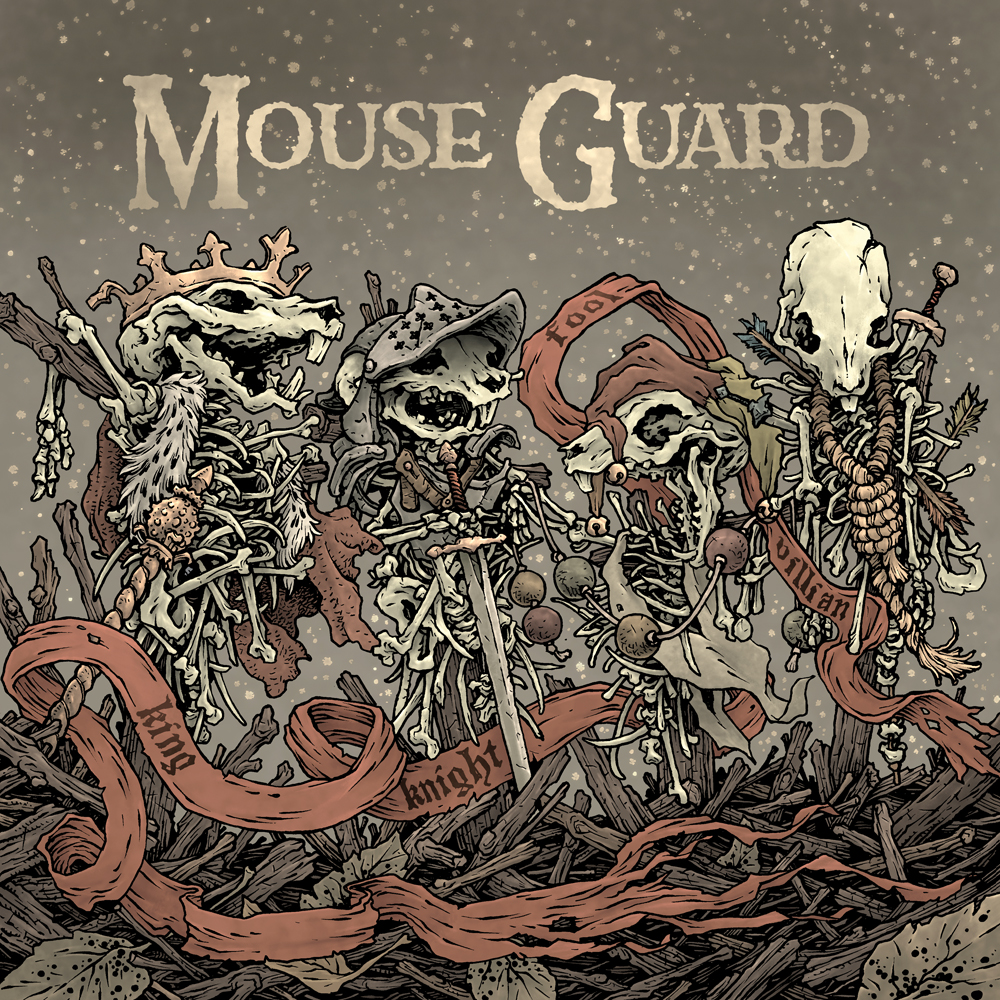
The story involves mouse skeletons dressed to be certain roles or figures in fortune telling, and the four main subjects of this story are the King, Knight, Fool, and Villain. I drew each set of bones on copy paper, and then on different sheets and on a lightpad, I added the clothing and props so that each would 'read' as their various roles. Another sheet was used to draw the ground cover and the ribbon that would snake around and bear each of their titles. I assembled all these elements in Photoshop and gave a quick blocking color pass so I could easily see what lines belonged to what forms.

I printed out the above layout (on two sheets of paper that needed to be taped together) and taped it to the back of a sheet of Strathmore 300 series bristol.
I inked the piece with Copic Multiliner SP pens (the 0.7 & 0.3 nibs) while on a light pad. That way I can use the printout as my pencil lines with no need to erase anything when the inks are done.
I added lots of dots in the background––but I knew that in the coloring stage I was going to color hold those so they looked less like ash and more like dust particles caught in the light.

When the inks were finished I scanned the original into Photoshop and started the coloring process. This first part of digital coloring is called 'flatting' which basically means filling in every area with flat base colors. A few of the color choices were already established in the rough (the muted clothing, the bones, and the ribbon), but in this stage I need to get the color palette set for the entire piece. I wanted something that was warm, but so muted it also felt cold.
As I mentioned above, I established a color hold (areas where I want the inked art to be a color other than black) for the dust in the air and the type on the banner ribbon.
Final Color:
Here again are the final colors for the cover. I rendered all the shading with the Dodge and Burn tools using a stock Photoshop textured brush.

No comments:
Post a Comment