

Here is my finished colored Dragon. And below are my steps to create it as well as the community submissions.

This month the prompt was two words: Wooly & Morose
I opened several tabs of google image searches of sad dragons, Pokemon's Snorlax, Rams & Sheep, and some Mercer Mayer illustrations

I printed that rough out and on a lightpad drew tighter pencils on a lightpad and a new sheet of copy paper.
Those pencils were then re-scanned and I cleaned up my color blocking to help me see what areas were what colors (what was horn vs wool, etc).
Those pencils were then re-scanned and I cleaned up my color blocking to help me see what areas were what colors (what was horn vs wool, etc).

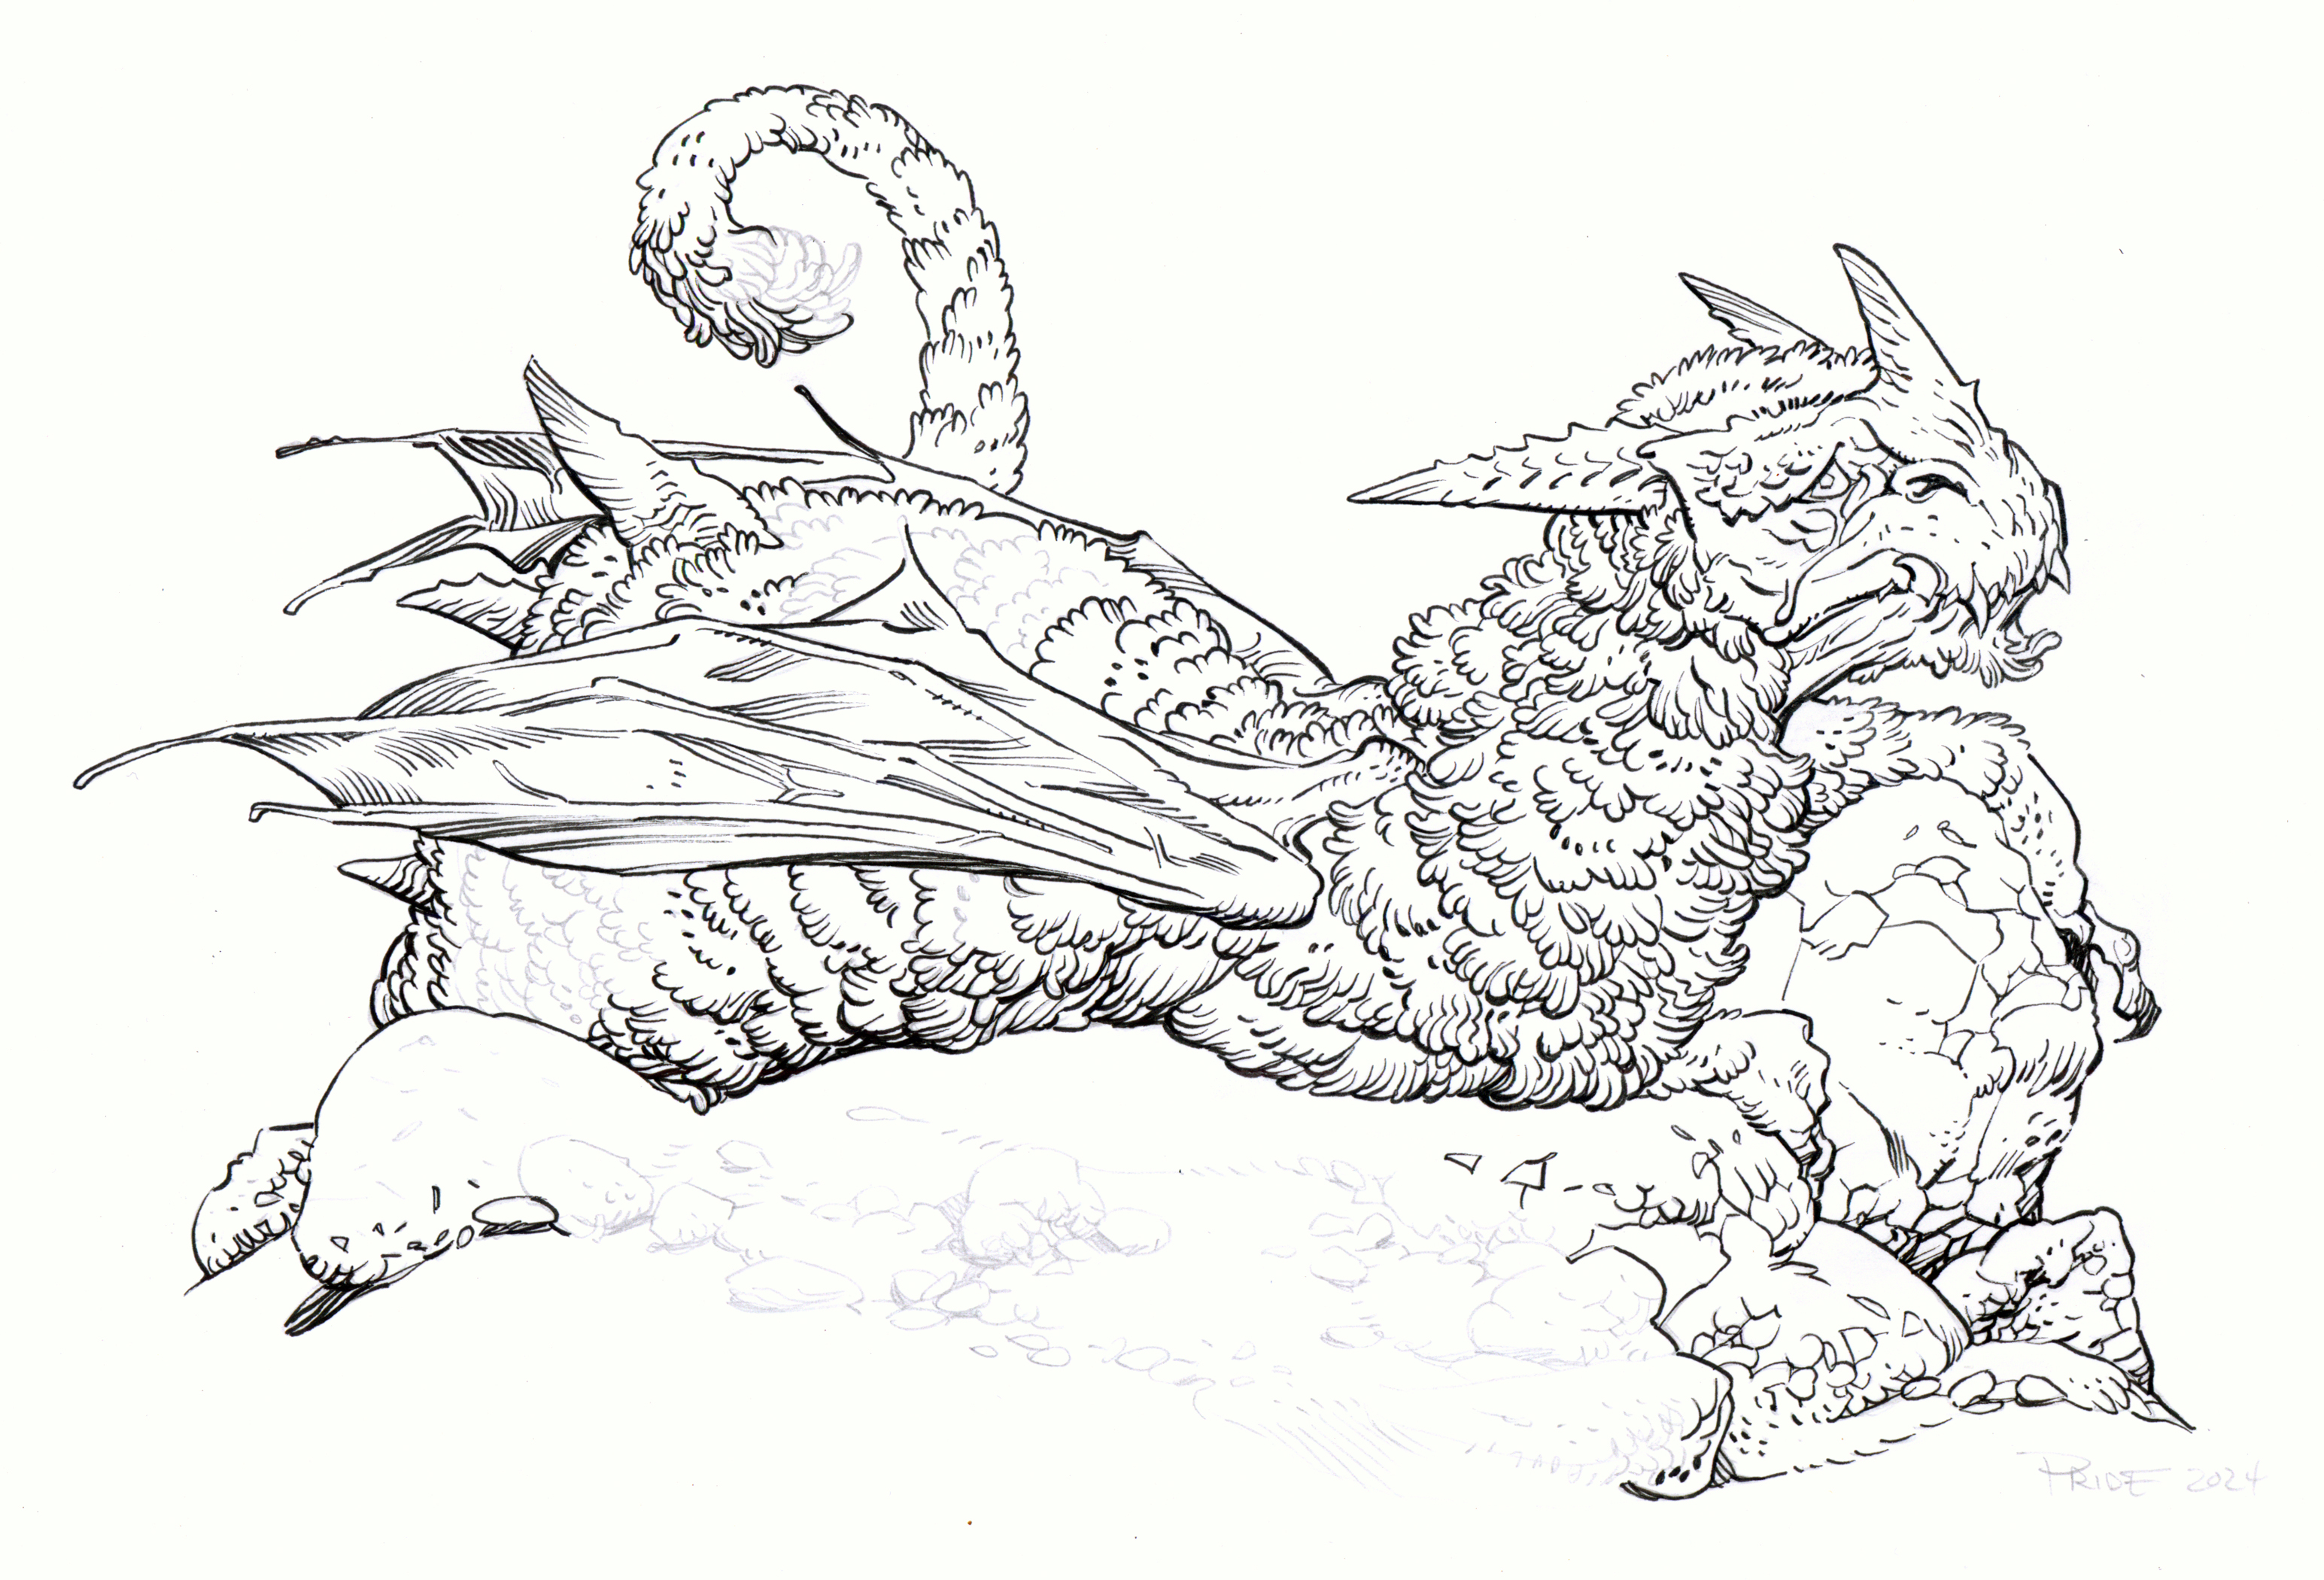
The inking on this piece started with the nose and mouth, but moved quickly to figuring out the texture and line density of the wooly hair so it felt matted and curly, but not heavy. I was unable to finish the inks on-stream, but returned to them later that night off-stream, where the inking continued on the rest of the body and the ankle and tail wool.

Then it was time to start the color flatting process––basically professional coloring-in-the-lines. Some of this is just to make it easy to re-isolate various parts when doing later painting & rendering. Most of the colors were established in the rough, but I played with the final value/hue choices.
For the final colors I used the dodge and burn tools to add shadows and highlights to give the dragon some form. Most of the work was in darkening in all the shadows in the wooly bits. and then––I opted to do a 2nd color hold on just the wooly bits. Below you can again see the final Dragon...

But, as this is a community event, I wanted to share all the other entries posted in the Discord.

druffzilla

jodudeit

Knickolaus
Nate Pride

redSkwrl

88UncleErnie

VernNYC

Kasey Snow

Towry

No comments:
Post a Comment